Setup
Welcome! Before the workshop there are three installs and one signup, about 15 minutes total. Doing it before we start means you spend the workshop building your sim instead of watching download bars. And if anything refuses to install, you have plenty of time to ask in chat and get it sorted.
1 · Install Python
- Go to python.org/downloads. Install Python 3.12 — not the newest one. Taichi (the graphics library we use) only works on Python 3.10, 3.11, or 3.12, and the big yellow download button gives you 3.13 or 3.14, which won't work with it directly. Grab the installer from the Python 3.12.10 release page — scroll to the bottom and pick the installer for your OS (Windows 64-bit or macOS). Newer 3.12 pages don't have installers anymore, so use that exact link.
- Run the installer.
- Windows: tick "Add python.exe to PATH" on the first screen. Then Install.
- Mac: keep clicking Continue through the prompts. Defaults are fine.
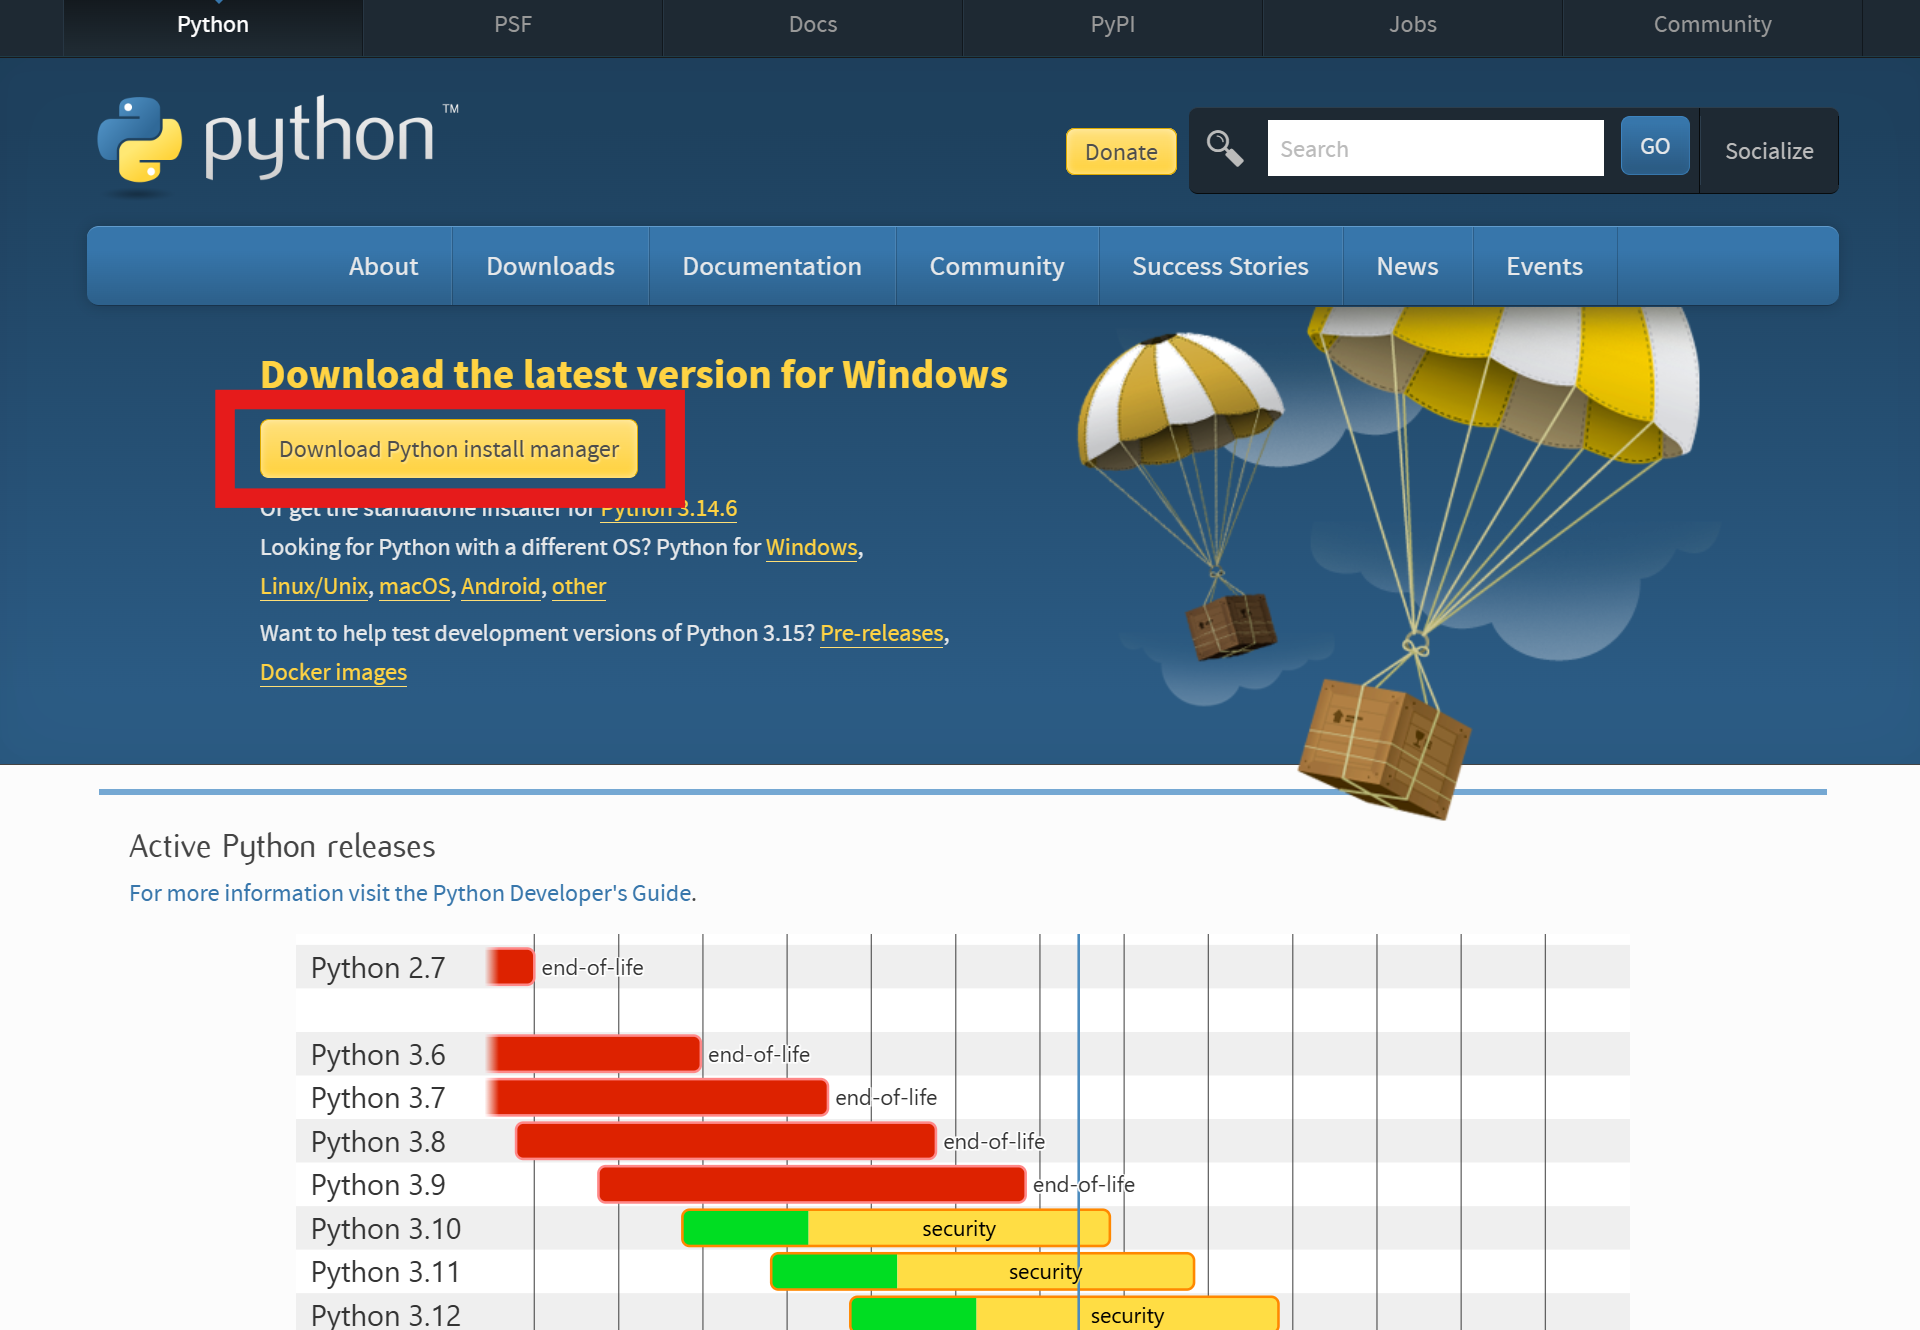
pip install uv (on Mac: pip3 install uv). That installs a tool called uv which can fetch its own private copy of Python 3.12 whenever a program needs one — your 3.14 stays untouched. Then, during the workshop, run your sim with uv run --python 3.12 --with taichi main.py instead of python main.py. Even easier: just tell the AI agent "run this with uv using Python 3.12 and taichi, my system Python is 3.14" and it handles the rest. The first run downloads Python 3.12 in the background (about 30 seconds), after that it's instant.2 · Install Git
Git is the tool that moves code between your laptop and GitHub (it also keeps a history of every change, which is why programmers use it for everything). You won't need to learn any Git commands today: Antigravity's AI runs them for you. It just needs Git installed on your machine first.
- Windows: go to git-scm.com/download/win. The download starts automatically. Run the installer and click Next through every screen. The defaults are all correct, including the credential manager that handles GitHub login for you later.
- Mac: open Terminal (Cmd+Space, type "Terminal", Enter). Paste
xcode-select --installand hit Enter. Click Install on the popup. Wait a minute or two.
One last thing: tell Git who you are. Every upload to GitHub gets stamped with a name and email, and Git refuses to work until you've set them. Open a fresh terminal (on Windows, search "Git Bash" or "PowerShell" in the Start menu; on Mac, Terminal) and run these two commands, with your own name and the same email you'll use for GitHub:
git config --global user.name "Your Name"
git config --global user.email "you@example.com"
Keep the quotes, swap in your details. No output means it worked. This is a one-time thing per laptop — you never have to do it again.
git --version. You should see a line like git version 2.xx.x. If it says "command not found", reinstall and let the installer add Git to PATH. Then type git config user.email — it should echo your email back.3 · Make a GitHub account
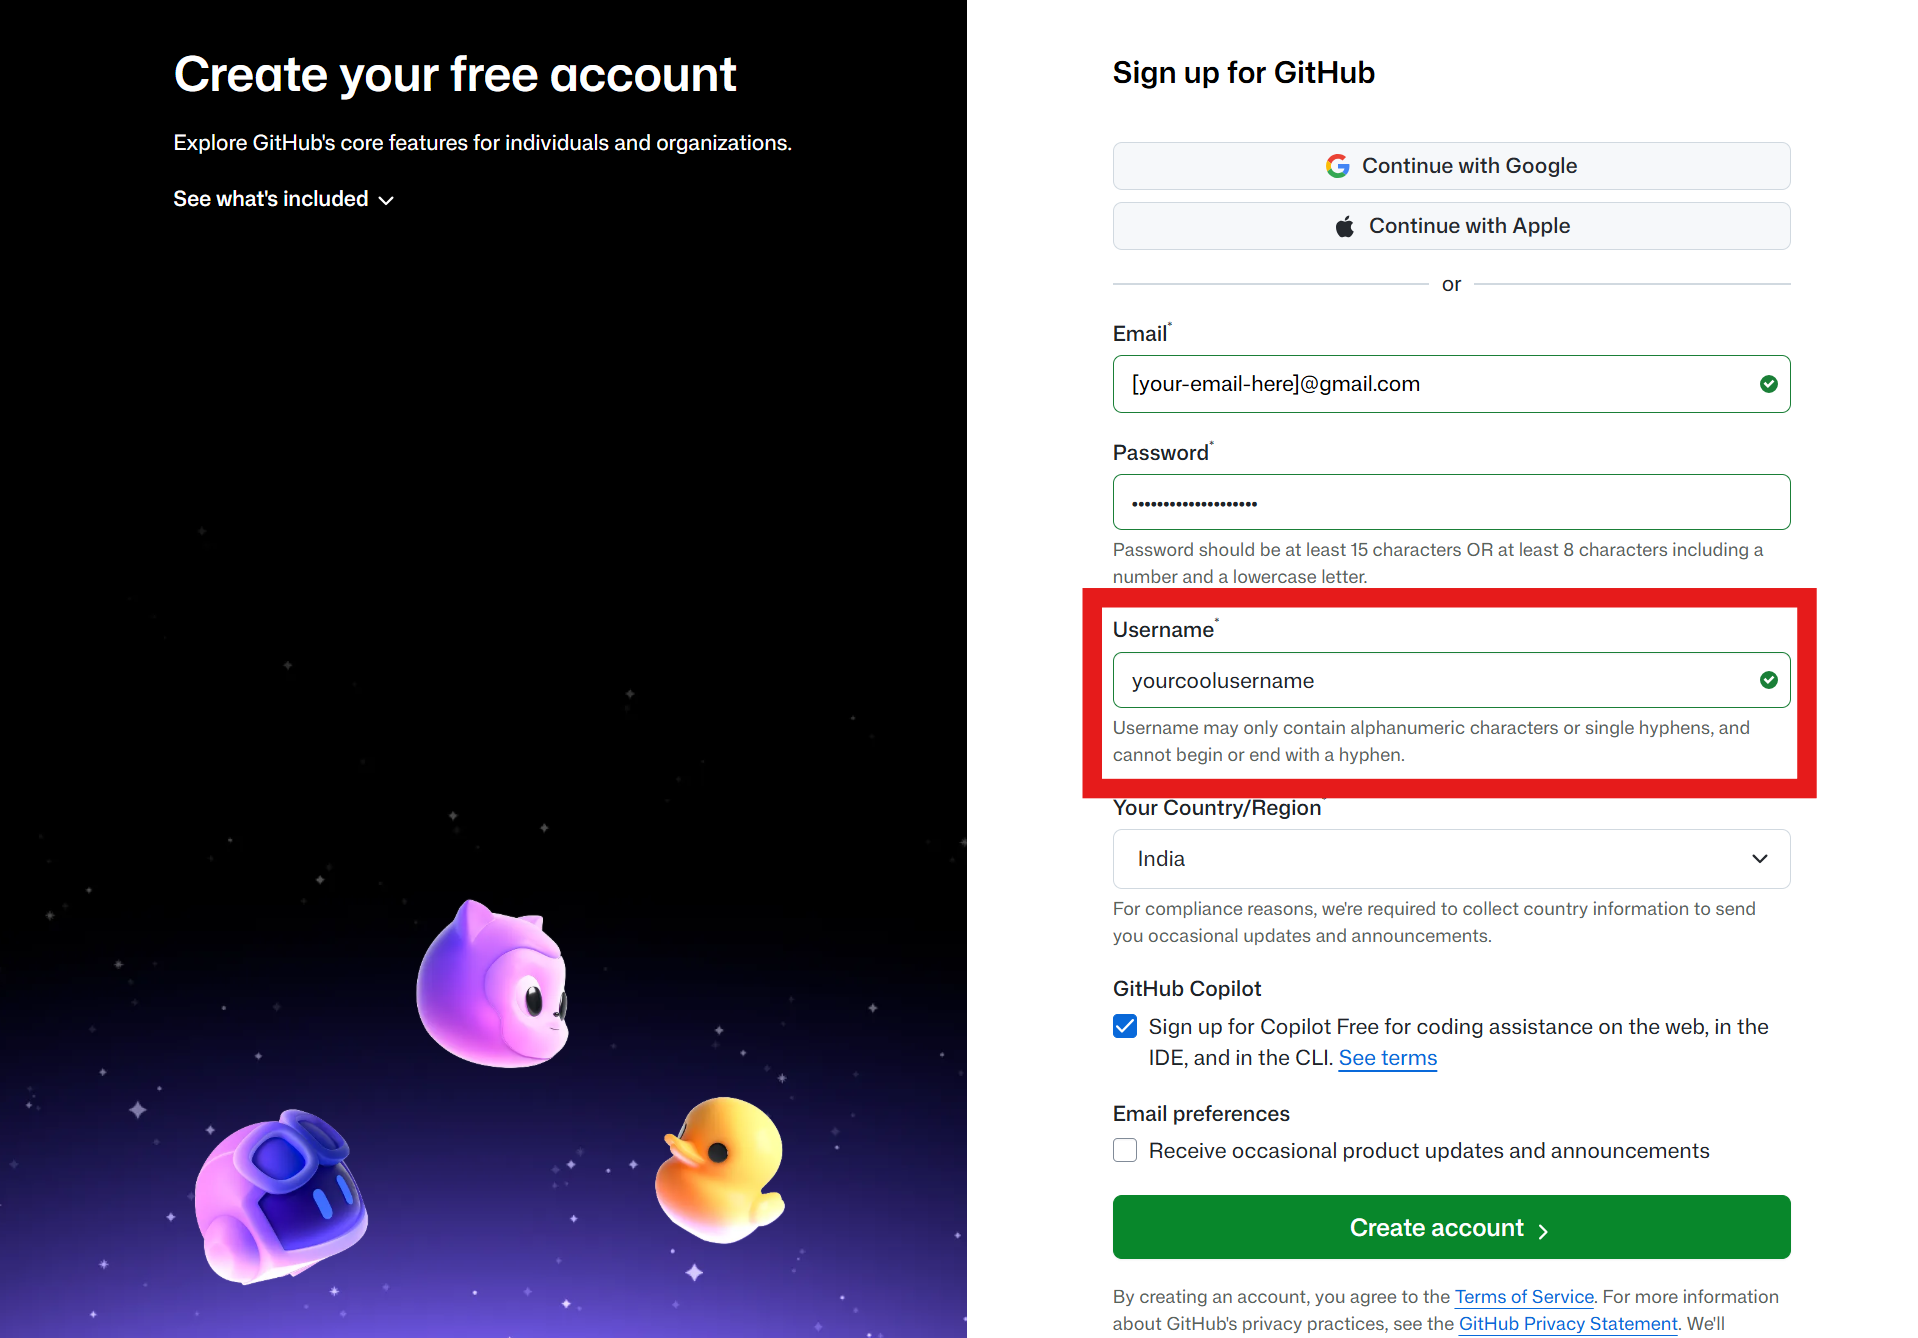
GitHub is a website where people store and share code. When your sim is done, you'll upload (or "push") it there, and that link is what you submit for the hackathon. It's how the judges see your code, how other participants can peek at what you built, and honestly a nice thing to have beyond this event: every programmer you'll ever meet has a GitHub profile, and yours starts here. It's free and takes about a minute. Already have an account? Skip this step, just make sure you remember the login.
- Go to github.com/signup. Use your real email — you'll need the confirmation link.
- Pick a username and password.
- Enter the code GitHub emails you. Skip every "personalize your experience" screen.
- Stay logged in on your browser — you'll come back to create a repo for your sim later.
4 · Install Antigravity
Antigravity is a code editor with an AI agent built in. You talk to it, it writes code and runs it. That's the whole workshop.
- Go to antigravity.google. Click Download. Pick the installer that matches your OS.
- Run the installer. On Mac, drag it to Applications.
- Open Antigravity. When it asks you to sign in, use Google (any Gmail). That's the whole login — no other accounts, no configuration.
- Skip any "import VS Code settings" or tutorial prompts. Just close them.
5 · Verify
- In Antigravity, open the terminal at the bottom (View → Terminal, or Ctrl+`).
- Run these two commands, one at a time (on Mac, type
python3instead ofpython):python --version git --version - You should see two version lines: any Python
3.10or newer, and any Git version. (If your Python is 3.13 or 3.14, just make sure you did thepip install uvstep from the callout in step 1 — that's your Taichi ticket.) - If both commands work, you're ready. Head to Build when you want to start your sim, and submit the final one on Submit whenever it's done.
pip install taichi in your project's terminal on its own. One less thing to worry about. (On Python 3.13/3.14 that install will fail — that's expected, it's what the uv trick from step 1 is for. Just tell the agent to use uv and carry on.)If something went wrong
Totally normal, setup hiccups happen to everyone. Find your symptom below:
- Antigravity says it can't find Python: reinstall Python with "Add to PATH" ticked, then restart Antigravity.
gitcommand not found: reinstall Git; on Windows use the default options.- Git says "Author identity unknown" or "please tell me who you are": you skipped the two
git configcommands in step 2. Run them and try again. python --versionsays 3.13 or 3.14: no reinstall needed. Runpip install uvonce, then run sims withuv run --python 3.12 --with taichi main.py. Full explanation in the callout under step 1.- Terminal shows a red error: copy the error, paste it into Antigravity's chat, say "fix this". It usually can.
- None of the above helped: take a screenshot and drop it in chat. Someone will get you unstuck.